A 12-minute Docker build that runs on every push to main costs your team roughly 60 hours of waiting per year — assuming just 20 builds a day. Multiply that across feature branches, PRs, and staging deployments, and you're looking at hundreds of hours lost to CI pipelines staring at npm install or pip install for the thousandth time.
The fix is Docker's layer caching system. When you build with Dockerfile instructions ordered correctly, Docker skips everything that hasn't changed and only rebuilds the layers that have. A 12-minute build becomes a 45-second build. But caching in CI is trickier than on your local machine — CI runners are often ephemeral, meaning the cache is gone after every job unless you take explicit steps to preserve it.
This article covers how Docker layer caching actually works, how to structure your Dockerfile to maximize cache hits, and how to wire it all up in CI so the cache persists between builds.
How Docker layer caching works
Every instruction in a Dockerfile — FROM, RUN, COPY, ADD — produces a layer. Docker stores each layer as an immutable snapshot of the filesystem changes that instruction made. When you build again, Docker checks whether each instruction and its inputs have changed:
- If nothing changed, Docker reuses the cached layer. Cache hit.
- If something changed, Docker rebuilds that layer and every layer after it. Cache miss.
That second point is critical. Caching is sequential. The moment one layer invalidates, every subsequent layer rebuilds from scratch regardless of whether its own inputs changed.
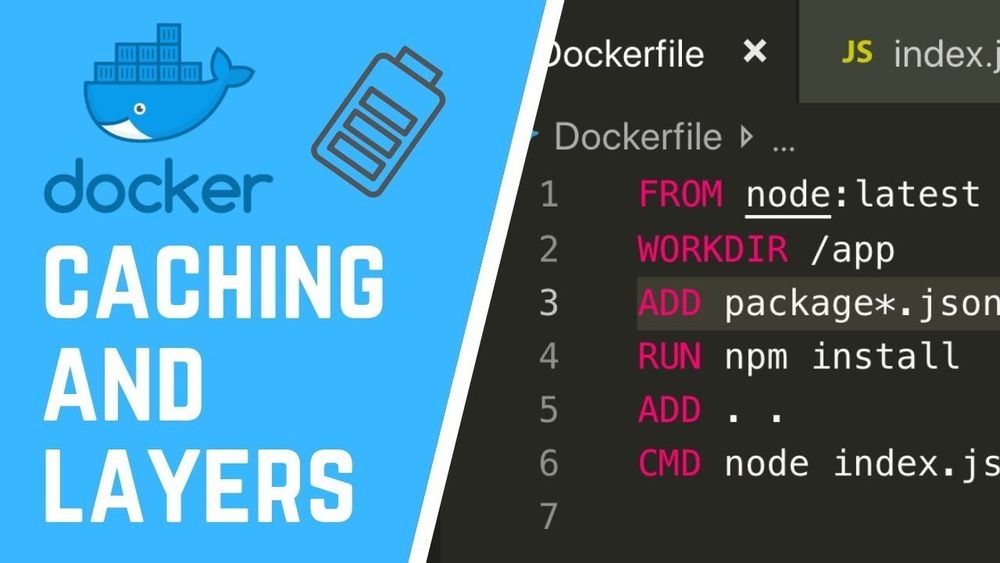
FROM node:20-alpine          # Layer 1 — changes only when base image changes
WORKDIR /app                  # Layer 2 — almost never changes
COPY . .                      # Layer 3 — changes on EVERY code change
RUN npm install               # Layer 4 — rebuilds every time because layer 3 changed
RUN npm run build             # Layer 5 — rebuilds every time because layer 4 changed
In this Dockerfile, changing a single line of application code invalidates the COPY . . layer, which forces npm install to rerun — even though your dependencies didn't change. On a project with 800 npm packages, that's 2-4 minutes wasted on every build.
The fundamental fix: copy dependency files before source code
The single most impactful change you can make when you build with Dockerfile caching in mind is to separate dependency installation from source code copying.
FROM node:20-alpine
WORKDIR /app

# Layer 1: copy ONLY dependency manifests
COPY package.json package-lock.json ./

# Layer 2: install dependencies (cached until package.json changes)
RUN npm ci

# Layer 3: copy everything else
COPY . .

# Layer 4: build the app
RUN npm run build
Now npm ci only reruns when package.json or package-lock.json actually change. Day-to-day code changes only invalidate layers 3 and 4, saving minutes per build.
This pattern works for every language:
Python
COPY requirements.txt ./
RUN pip install --no-cache-dir -r requirements.txt
COPY . .
Go
COPY go.mod go.sum ./
RUN go mod download
COPY . .
RUN go build -o /app ./cmd/server
Rust
COPY Cargo.toml Cargo.lock ./
RUN mkdir src && echo "fn main() {}" > src/main.rs
RUN cargo build --release
RUN rm -rf src
COPY . .
RUN cargo build --release
The Rust example uses a trick: it creates a dummy main.rs to build dependencies first, then replaces it with real source code. This works because cargo build caches compiled dependencies separately from your code, and the layer with compiled dependencies survives as long as Cargo.toml and Cargo.lock don't change.
Why CI caching is different from local caching
On your laptop, Docker keeps a local layer cache that persists between builds. Run docker build twice with no changes, and the second build completes instantly.
CI environments are different. Most CI platforms — GitHub Actions, GitLab CI, CircleCI — use ephemeral runners. Each job gets a fresh VM or container with no Docker cache. Your carefully ordered Dockerfile doesn't help if there's no cache to hit.
You have three options to fix this:
- Registry-based caching — push and pull cache layers from a container registry
- CI-native caching — use the CI platform's cache mechanism to persist Docker's build cache
- BuildKit inline caching — embed cache metadata in the image itself
Each has trade-offs. Let's walk through them.
Registry-based caching with --cache-from
The most portable approach: push your built image to a registry, then tell subsequent builds to use that image's layers as cache.
# Pull the previous build (ignore failure if it doesn't exist yet)
docker pull myregistry.com/myapp:latest || true

# Build with the pulled image as cache source
docker build \
  --cache-from myregistry.com/myapp:latest \
  -t myregistry.com/myapp:latest \
  -t myregistry.com/myapp:$(git rev-parse --short HEAD) \
  .

# Push the new image (which becomes cache for the next build)
docker push myregistry.com/myapp:latest
docker push myregistry.com/myapp:$(git rev-parse --short HEAD)
Pros:
- Works with any CI platform
- No special configuration needed beyond registry access
- Cache is shared across all branches (anything can pull
:latest)
Cons:
- The initial
docker pulltakes time — you're downloading the entire image before building - Only works for layers that produce identical filesystem output. If BuildKit uses a different content hash, caching silently breaks
- Doesn't cache multi-stage build intermediate stages by default
BuildKit cache backends: the modern approach
Docker BuildKit (enabled by default since Docker 23.0) supports dedicated cache backends that are purpose-built for CI. This is the approach most teams should use in 2026.
GitHub Actions cache backend
# .github/workflows/build.yml
jobs:
  build:
    runs-on: ubuntu-latest
    steps:
      - uses: actions/checkout@v4

      - name: Set up Docker Buildx
        uses: docker/setup-buildx-action@v3

      - name: Build and push
        uses: docker/build-push-action@v6
        with:
          context: .
          push: true
          tags: myregistry.com/myapp:latest
          cache-from: type=gha
          cache-to: type=gha,mode=max
The type=gha backend stores Docker build cache in GitHub Actions' built-in cache (the same one used by actions/cache). The mode=max flag caches all layers, including intermediate stages in multi-stage builds.
mode=maxcaches every layer in every stage.mode=min(the default) only caches layers in the final stage. For CI, you almost always wantmode=max— the intermediate stages (dependency installs, compilation) are the expensive ones.
Registry cache backend
For CI platforms without a native cache integration, you can push cache layers to a registry as a separate cache image:
docker buildx build \
  --cache-from type=registry,ref=myregistry.com/myapp:cache \
  --cache-to type=registry,ref=myregistry.com/myapp:cache,mode=max \
  -t myregistry.com/myapp:latest \
  --push \
  .
This is different from the --cache-from approach above — BuildKit stores cache metadata alongside the layers, making cache matching far more reliable.
Local directory cache backend
Useful when your CI runner has persistent storage between jobs (like a self-hosted runner):
docker buildx build \
  --cache-from type=local,src=/tmp/docker-cache \
  --cache-to type=local,dest=/tmp/docker-cache,mode=max \
  -t myapp:latest \
  .
Multi-stage builds: cache the expensive stages
Multi-stage builds are essential for producing small production images, but they also unlock a powerful caching strategy: put your most time-consuming work in early stages that change infrequently.
# Stage 1: dependencies (changes rarely)
FROM node:20-alpine AS deps
WORKDIR /app
COPY package.json package-lock.json ./
RUN npm ci

# Stage 2: build (changes on every code push)
FROM deps AS build
COPY . .
RUN npm run build

# Stage 3: production image (small, no dev dependencies)
FROM node:20-alpine AS production
WORKDIR /app
COPY --from=deps /app/node_modules ./node_modules
COPY --from=build /app/dist ./dist
CMD ["node", "dist/index.js"]
With mode=max caching enabled, the deps stage is cached until your dependency files change. The build stage reruns on code changes but starts instantly because it inherits cached layers from deps. The production stage just copies files — it's nearly instant.
Real-world impact: a React app with a large node_modules and a TypeScript compilation step can go from an 8-minute uncached build to a 30-second cached build when the deps stage is preserved.
.dockerignore: the overlooked cache killer
A missing or incomplete .dockerignore file can silently destroy your cache efficiency. Every time you run docker build, Docker sends the entire build context (your project directory) to the daemon. If your build context includes files that change frequently but aren't needed in the image, those changes invalidate the COPY layer hash.
Common offenders:
# .dockerignore
.git
node_modules
dist
*.log
.env*
.DS_Store
__pycache__
*.pyc
coverage
.next
The .git directory is the worst offender — it changes on every commit, and it's often several hundred megabytes. If you're not excluding it, every single build is a cache miss on any COPY layer that uses the build context.
A good test: rundu -sh --exclude=.git .in your project root. If the result is dramatically smaller thandu -sh ., your.dockerignoreis probably missing.git.
Pinning base images for predictable caching
Using FROM node:20-alpine means Docker pulls whatever the current 20-alpine tag resolves to. If the upstream image is updated (security patch, minor Node version bump), your FROM layer cache invalidates and every subsequent layer rebuilds.
For CI caching stability, pin your base image to a specific digest:
FROM node:20-alpine@sha256:1a2b3c4d5e6f...Or at minimum, use a more specific tag:
FROM node:20.11.1-alpine3.19This keeps your cache stable until you intentionally update the base image. The trade-off is that you won't automatically pick up security patches — so set a reminder or use tools like Dependabot or Renovate to create update PRs.
Measuring the impact
Don't guess — measure. Add timing output to your CI logs:
time docker buildx build \
  --cache-from type=gha \
  --cache-to type=gha,mode=max \
  -t myapp:latest \
  .
Or use BuildKit's built-in progress output to see exactly which stages hit cache and which rebuilt:
docker buildx build --progress=plain ...The --progress=plain flag shows each step with CACHED annotations for cache hits. Review these after optimizing your Dockerfile to verify that the layers you expected to cache actually did.
After the build: deploying the image
Optimizing your Dockerfile and CI caching gets you a fast, reliable build. The next step is getting that image into production. This is where your choice of platform matters.
If you're pushing to a self-managed server, you need to set up a registry, configure pull credentials, handle rolling deploys, and manage the runtime. If you'd rather skip that, platforms like NoVPS accept Docker images directly and handle the deployment pipeline — you push to the built-in container registry, and the platform runs your container with managed infrastructure around it (databases, storage, CDN). It integrates naturally with the CI caching workflow described here: your GitHub Actions job builds the image with full layer caching, pushes it to the registry, and the platform picks it up.
Checklist: Dockerfile caching best practices
Before you go, here's a quick checklist you can apply to any Dockerfile today:
- Dependency files are copied before source code.
COPY package.jsonbeforeCOPY . . .dockerignoreexcludes.git,node_modules, build artifacts, and logs.- Multi-stage builds separate dependency installation, build, and runtime.
- CI uses BuildKit cache backends (
type=gha,type=registry, ortype=local) withmode=max. - Base images use specific tags or digests, not just
:latestor a major version. --progress=plainis used in CI to verify cache hits in build logs.RUNcommands that install packages use--no-cache(apk) or--no-cache-dir(pip) to avoid storing package manager caches in the layer.
Each of these individually saves seconds. Combined, they turn a slow CI pipeline into something your team stops complaining about.


